
 The idea was not originally mine as i found it on the youtube, posted by rctestflight on my quest searching something simple for my son to play with. Interesting enough it uses small servos for drive which i have laying around and foam board as the skeletons. Seeing it as a great couple of hour project, i proceed to make it in one afternoon. Here is my way of doing it.
The drive (servos)
We will need:
- 2 working servos which we going to modified as a 360deg.
- 2 broken servos for parts.
First open your broken servos for its potentiometer. You will need two of them. I just cut mine from 2 of my broken 9g servo. This will be used to replace the potentiometer inside the servos we want to be 360deg servos.

Open the other 2 working servo, in my build i am using the Hobbyking 10g. Remove the 3 wires connected to the board from the potentiometer. We are not going to use the inside potentiometer.
Next solder the potentiometer that you salvage from your broken servos to the board and cut the plastic notch/stopper under the main gear of your servos for it to be able to rotate freely. Now you can put it all together. The potentiometer can be glued to the servos itself.
Plug the servos to a servo tester or your rc system and power it up. Your servos might rotate continously at this stage. Turn the potentiometer until your servos stop moving and make it permanent using a CA glue on the potentiometer. But your servo might still moving slowly later, that can be solve using subtrims to make it stop.
Now you have a servo which can rotate 360deg on each direction and stop once you center your stick. Hence you have your drive motor (complete mod here).


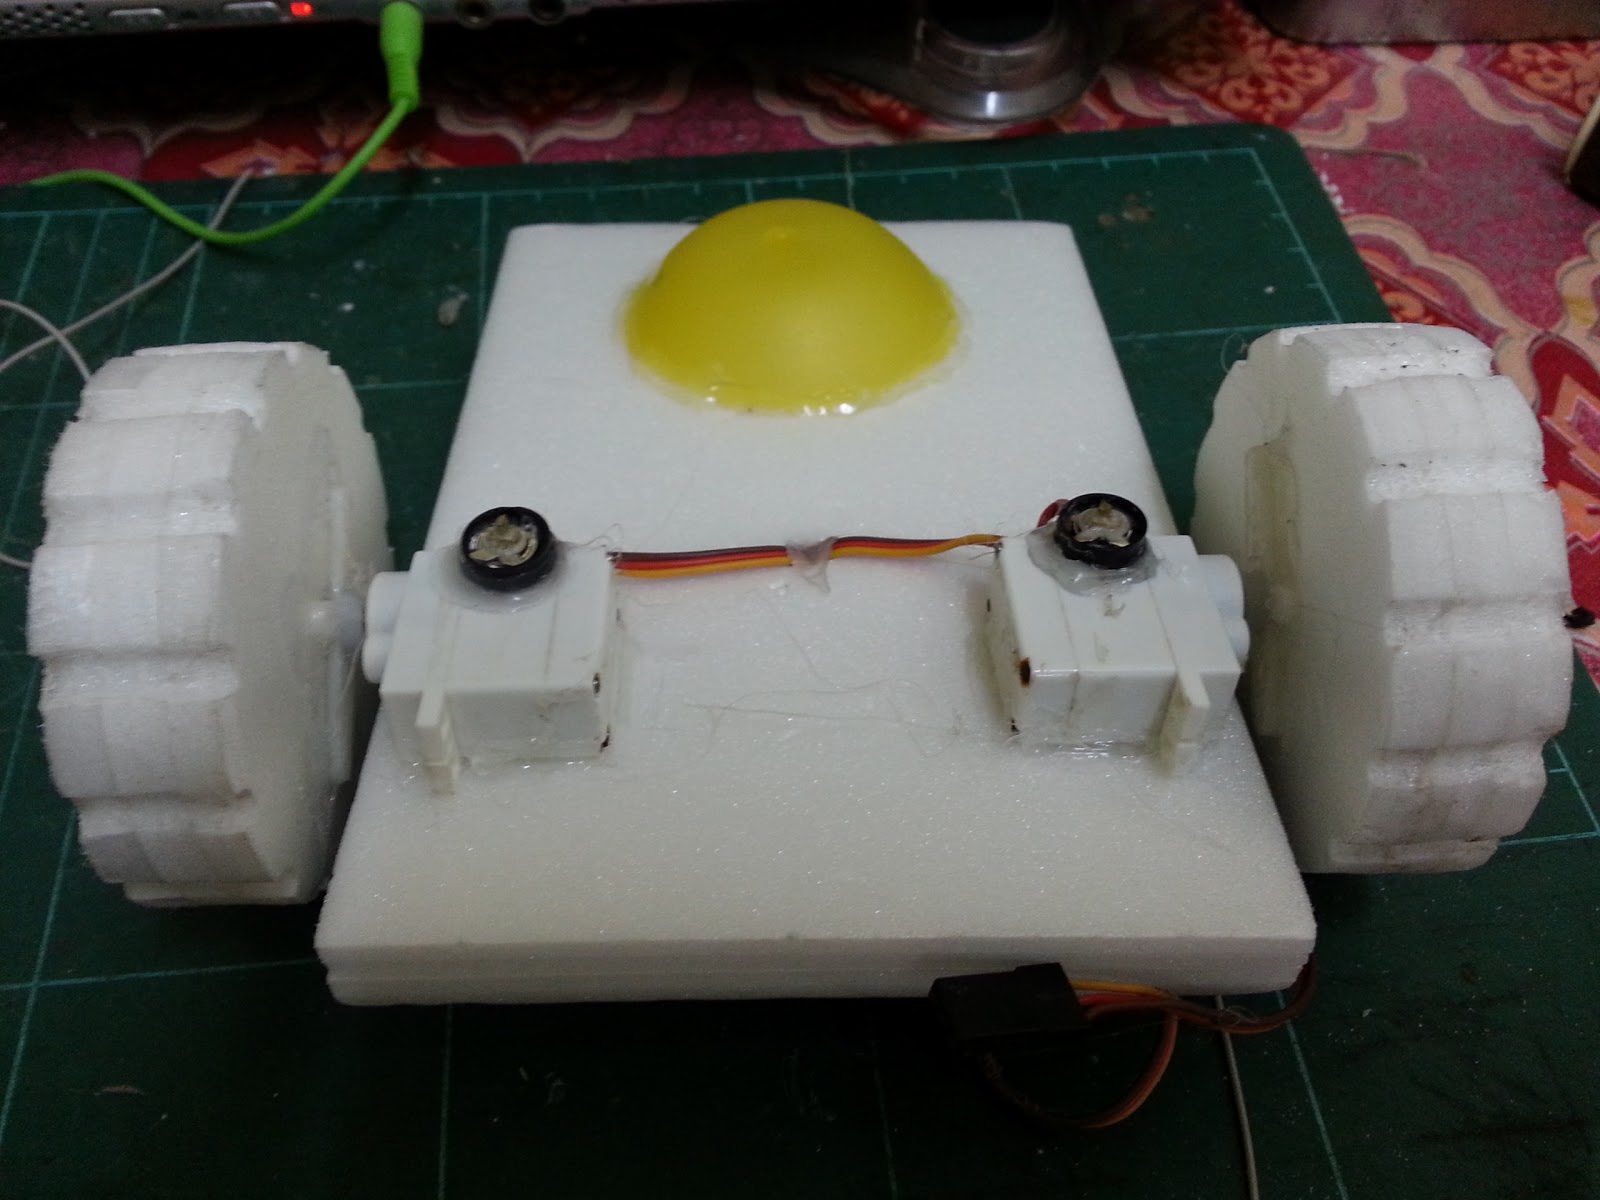
The Wheel
I am using compress foam sandwich together to make the wheels which then glued to the control horns of the servos.


Placing it all together
The yellow dome act as a back skid. I am using a cap from an air refreshner. The hole on the wheels are for tightening the servo horns screws. Now you can put it all together, program your transmitter and you are ready to rover. I am using my left hand stick (mode one) on the transmitter as its both spring loaded so its neutral position is center which we want as a stop position.
For a non-programmable transmitter, you can use a vtail mixer plug in between the two channel that you used to control both your servos.

This build seems to be a nice vehicle as a cheap gound fpv platform or just driving around having fun.
Happy building guys.
No comments :
Post a Comment
pls leave your email or other means of contact info.